Tuesday, January 15, 2013

Fairy Tale Feast: Cinderella

Today I'm going to focus less on 
ingredients
and more on
inspiration. 


I thought it would be fun to throw together a fairy tale theme dinner that all ages could enjoy. 


This picture is inspiration for what I came up with. 

Here's what's on the menu:
Cinderella Stew
Twice Baked Potato Mice
Magic Fruit Wand


For the stew:
You can use your favorite stew recipe. 
You could even do this with chili or soup. 
Cinderella Stew just had a nice ring to it. 
If you're looking for stew inspirations take a look at these:

Paula Dean teaches you how to cook up an Ol Time Beef Stew
If you're looking for a chicken stew Giada De Laurentiis has one to share with you. 
Last but not least lets not leave out a pumpkin stew!

First thing to do is cook up your stew.


Then prep your pumpkin.
Cut off top,
scoop out guts,
fill with stew, 
bake.


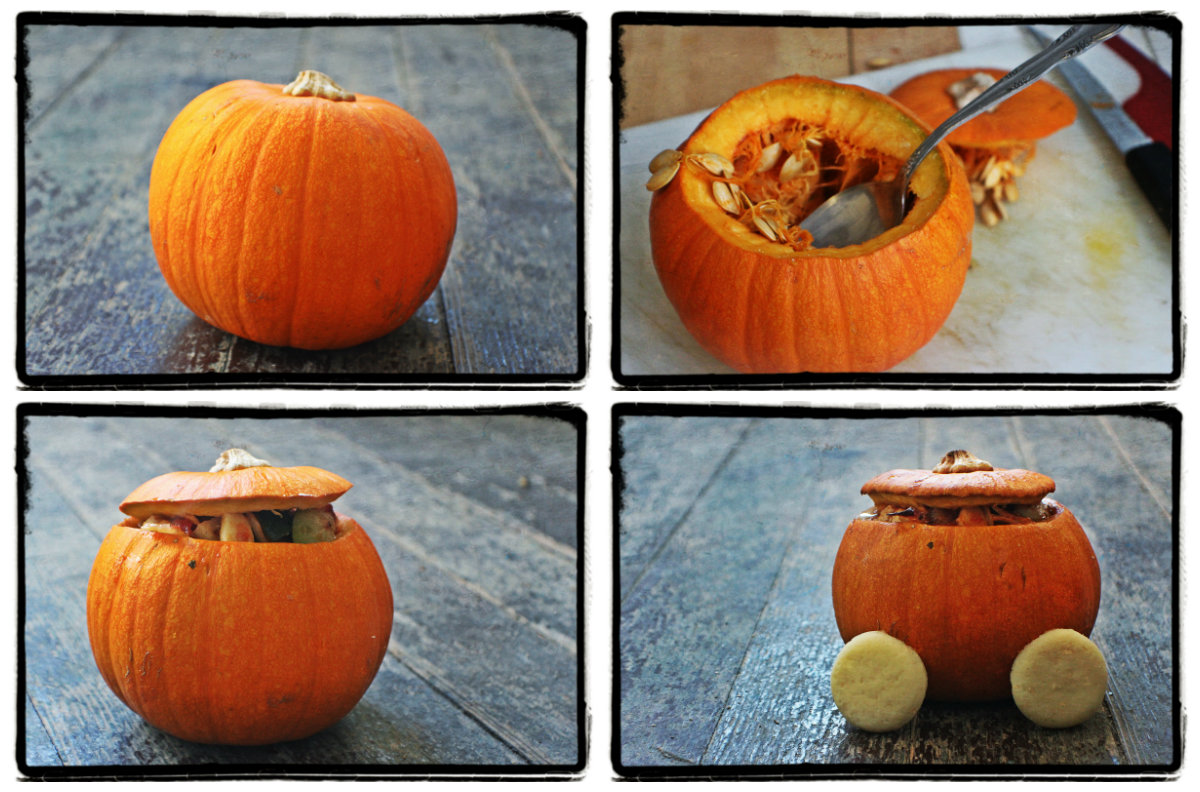
Bake until pumpkin flesh is soft. 
The stew is going to help flavor the pumpkin and make it yummy to eat after you're finished with your stew. 
I used a small pie pumpkin for my pumpkin. 
After this comes out of the oven and cools add small cheese wheels. 
A Babybell cheese wheel cut down the middle works great. 


On to the mice. 
I used simple mashed potato fixins to flavor my potatoes. 
Garlic, butter, milk, cheese, sour cream. 
Here's  a whole rundown on how to make an ULTIMATE twice baked potato.


First I steamed the potato in a Ziploc Steamer bag for 6 min. 
I let it cool and scooped out the inside. 
I put the inside with all the fixins into a ziploc bag. 
This is where you let the kids SMASH. 
Cut off corner and let kids fill potato shell with mixture. 

Time to decorate. 
I used:
small baby tomato - nose
(toothpick to hold in place)
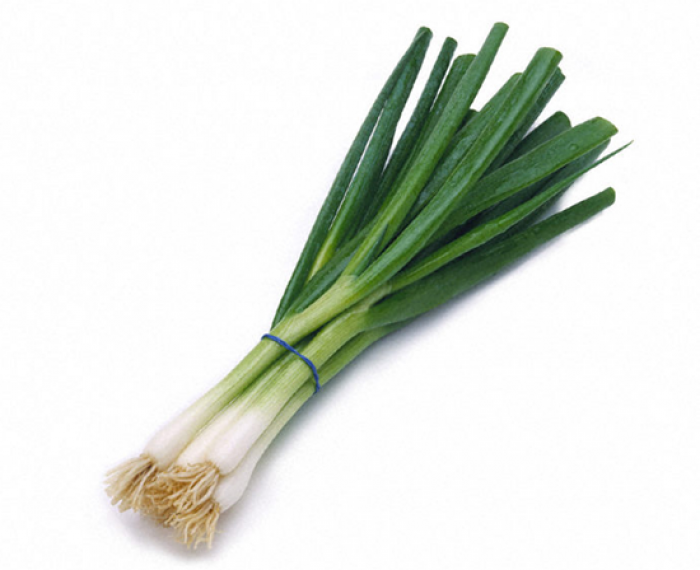
green onion - whiskers & tail
olive - eyes
watermelon radish - ears


The whiskers can be a little tricky to stay put. 
Try using mashed potato mixture as glue!


Now the wand. 
You can use any fruit to add to the wand.
I used grapes. 
I like to use kabob skewers for things like this.
For small hands use a popsicle stick or a chopstick to avoid the pointy end. 
For the star I used a star fruit. 
Personally I strongly dislike star fruit but it looks cool. 
You could also use a watermelon slice and let the kids cut out star shapes. 


There you have it!
The makings of a Fairy Tale Feast!
Pair this with a story time reading of Cinderella and you're sure to have a magical day of amusement.

Monday, January 14, 2013

ABC Oatmeal Cake

January is National Oatmeal Month!
Not the most exciting holiday but worth celebrating!
I decided to bake a cake to celebrate the holiday
I found this recipe and decided to play around with it just a bit. 

What I came up with was 

ABC Oatmeal Cake
with an creamy apple butter drizzle

Let's get to baking
here's the recipe

1 cup quick oats, uncooked
1 cup boiling water
1/2 c butter
1 cup sugar
1 cup brown sugar
1/2 cup buttermilk
1 banana MASHED
2 eggs, beaten
1 teaspoon vanilla extract
1 1/2 cups all-purpose flour
1 1/4 teaspoon baking soda
1/2 teaspoon salt
1/2 teaspoon nutmeg
1 teaspoon cinnamon
1 large apple chopped

Step One:
Preheat oven to 350 degrees

Step 2:


Grease and flour a 9 x 13 inch pan. 
Set aside

Step 3:


Pour boiling water over oats in a bowl. 
Let them sit for 20 min

Step 4:

Beat butter with both sugars in a large mixing bowl. 
Make them light and fluffy. 

Step 5:


Mash up a banana. 
Make this kid fun and friendly by placing the banana in a ziploc bag. 
Once banana is mashed cut off a corner and let kids squeeze it into the bowl. 
Add the mashed banana to the fluffed up sugar and butter. 
Add cooked oatmeal at this time.
Also add buttermilk


Step 6:


Beat eggs and vanilla together. 
Add this to wet mixture. 

Step 7:


Sift together and flour other dry ingredients. 
Add to wet mixture and stir together. 

Step 8:


Chop up apple. 
I leave the peel on. 
We didn't notice it was there when we were eating the cake. 
I like to use one of these slap choppy guys with kids. 
They have a great time destroying produce with it. 


Some of the cherries were pretty large. 
I decided to chop them up a bit so you could get more cherries in each bite. 

Step 9:

Add apples and cherries to mixture 
stir until blended

Step 10:


Bake it Up!


While the cake is baking make up the glaze

We don't eat too much frosting in our house so I decided to make up a glaze for this. 
Plus I had all that apple butter that I made earlier this week

Apple Butter Cream Cheese Glaze

8 ounces whipped cream cheese
1/2 cup apple butter
3 tablespoons soft butter
1 tablespoon milk
1 teaspoon vanilla extract
1/2 teaspoon cinnamon
2 cups powdered sugar

Beat cream cheese with butter and apple butter until smooth
Add milk, vanilla, cinnamon, and powdered sugar. 
Beat until frosting is smooth. 
Store in fridge.


When cake is done remove from oven and let cool. 

Drizzle with glaze

Enjoy the holiday!


Friday, January 11, 2013

Easy Edible Finger Paint


    I naturally am a very messy cook
this is something I unfortunately pass on to kids when I cook with them. 
I'm a believer in embracing my faults I can't change
sooooooo

LETS MAKE A MESS!

This is a SUPER simple recipe to make edible finger paints with your little ones.
They love to help stir this up, get messy, lick their fingers, and make some art all at the same time!

Start with the ingredients:
These are all inexpensive items you may already have in your house


PUDDING CUPS


 FROZEN BLUEBERRIES


FROZEN SPINACH


FROZEN CHERRIES


Step One:
Place each frozen item in the microwave for about 1 minute
with the fruit this gives it just enough time to thaw and release some juice 

Step Two:
Pour liquid directly into pudding cup
don't add the actual fruit, this keeps the paint smooth

For spinach: add thawed spinach and pudding into blender
blend up smooth (will still be a little lumpy)
pour blended mixture back into pudding cup

If you would like a stronger color add fruit into blender with a pudding cup
(leave out the juice)

Let the kids stir the colors all together.

With the blueberries and cherries stir the juice in just a little bit
this way you won't have to worry about the juice staining the child if they get it on them!


Step Three:
Gather items to use as painting tools
I love using the bottom end of a green onion


The roots make great paint brushes

Find some fruit you might have laying around

cored apple rings make great circles 
and the hole in the middle gives the child a handle to grab onto

carrots can be made into flower and heart shapes by cutting Vs into the side

and the classic potato stamp is always a trusty go to 


Step 4:
What to paint on?
I like to use old paper bags


This gives plenty of room for the child to paint on

Also try using the packaging the pudding cups came in to make a silly face
Let the kids creativity run wild!

 
My favorite kitchen helpers tested out the flavors, we gave them 2 thumbs up


Make sure to set some of the mixed pudding aside 
this can be used to make into a fun snack
layer different colors in a clear class dish
add granola, fruit, or crushed up cereal between each layer 

Create & Enjoy!


Tips:
*Use the cups that the pudding came in to put the paint colors into
this saves you extra clean up 

*Do this activity at the table, on the kitchen floor, or out in the yard
that way it's an easy wipe down when you're all done

*Take a picture of the artwork when the kids are finished
because the pudding can spoil you can't frame the painting 
but you can frame the picture of the painting!

*let kids pick out some of the things to paint with
they may have an idea that would have never crossed your mind

*play around with different foods for different colors
carrots make a great orange color 

*if your pooch does decide to join in on the fun
a little of the pudding won't hurt them 
BUT
don't let them have too much!
Just a lick or two. 
My dogs have iron guts but dogs shouldn't have too much sweet stuff.


Wednesday, January 9, 2013

Applesauce Update

Don't forget if you have kidos this is a great project to get their help on!
One of my favorite activities to have kids help me with is 

SMASHING!

So here's how this recipe can become little helper hand friendly...

Once apples are cooked remove from crockpot

depending on age round up a few common kitchen items

for little helpers...
Grab a ziploc style bag and add the cooled apples
tightly close the bag
hand off to kido
and let them smash to their hearts content!

For kids a little older


Grab a large bowl and tater masher
add cooled apples to bowl
stand back and behold the destruction!

While they are doing this you can process the rest of the apples or if you have time let them do the whole batch. 

With both of these methods the kids can dig right in after mashing
they can even help add a few flavors
try topping with fresh fruits or squeezing a little honey to sweeten it up a bit!


Monday, January 7, 2013

Easy Crockpot Applesauce to Apple butter


One of the easier and yummier things that I leaned how to do last year was make my own applesauce and apple butter from scratch. 
All you need is a crockpot, a bag of apples, a few hours, and a few simple add ins.
Let's get started with the apples.
A large bag of apples from your regular grocery store will do the trick for this.
I know there are some guidelines out there about the best apples to use for applesauce but 
I like to follow this one

USE APPLES THAT TASTE GOOD

Don't think to hard about this. These apples are going to get cooked down, softened up, and mushed into a delicious frenzy. 
I like to use granny smith to add a tartness that plays well off of any sweet add ins, then I usually throw in a few tasty other types into the bunch
try
Pink Lady
Honeycrisp
and my new favorite
Opal
These gems pack a delicious punch. 

Once you've wrangled up your apples and washed them it's time to core them. 
I don't bother with taking off the peel. Once these are blended up you won't even realize they were left on. 
You could could do this step by hand but this apple corer is a handy tool we have in our kitchen that I love to use. 


Separate the slices from the core
Slices go in the crockpot
core goes to the compost, garbage, birds, apple after life


Add all your slices to the crockpot. 
At this point some people prefer to add lemon, this will keep the apples from changing too much color. 
Some people also prefer to add seasoning into the pot at this time.
I like to cook my apples naked
this gives me more freedom to play with the flavors later after I have everything blended up.


Set cooker on 
LOW 
for 
3 HOURS
leave the lid on for this.


3 hours later this is what your apples would look like before & after being blended.
The best for blending these up would probably be an immersion blender. 
You could also you a potato masher, food processor, or what I did...a blender. 
If using a blender do small batches until you have a smooth texture. 

Now lets add flavor


A lot of recipes call for apple juice. 
I say why not step this up a notch and brew up a cup of cider?
I used a single serve packet of mulling spices in a cup of apple juice.
This is going to add great flavor to your sauce and butter with little work. 
For apple sauce I added 1/4 c to the blended apples


These are a few basics that you can add in. I suggest doing easy recipes like this to taste. 
Start with small amounts of flavors you know you love 
sample
add more as needed. 

This batch I used 1/4c white sugar
dash of vanilla
squeeze of honey
generous sprinkle of cinnamon

After flavor is added your applesauce is complete!
Good Job!


Garnish with a fresh apple slice and sprinkle cinnamon on top
or
grab a hand full of fresh blueberries add to blender with applesauce and zest in some ginger
blend
enjoy

On to the BUTTER!
this is easy stuff


Place the remaining sauce back into the crockpot
crack the lid
keep cooking on low for 1-2 hrs
stir when needed
This step is going to thicken the applesauce into the apple butter


After apple butter is done place the finished product in a sealed container. 
Keep this vile of deliciousness in your fridge.
Add to toast, waffles, crepes, and other goodies!
Hope you enjoy
here's a recap of what we did


Allow me to introduce myself

Welcome!

Thanks for stopping by. I figured before we start making delicious memories together we should get acquainted. 
My name is Phyllis and I love to make things. 
Food, photos. crafts, I really just enjoy teaching myself how to do new things. 
There is one thing I love more than making things tho...
eating things
I love to eat! 
I love to make new things to eat, making things for people so we can eat together, discovering new food, and having people make me things so I can eat them. 
I made a goal this year to celebrate at least one food related holiday a month and throw a party for it. I added on to that and decided I also wanted to bake at least 1 cake a month. 
That's part of where this blog stems from.
I'm also lucky to have a job where I get to play with food and get people as excited about it as I am. 
For the past couple months I've had the pleasure of finding foods to teach kids to make. This is where the crafty cook part of me comes out.
When I'm teaching kids to cook something I love to find ways to make the food fun. 
Some parents may not like this but I encourage kids to play with their food. 
I don't stop at just kids though, I encourage people of all ages to play with their food. 
I encourage YOU to play with your food. 
I love finding ways to make food 

EASY
INTERACTIVE
&
FUN

There's a lot of recipes that I have stored up for kids and adults that I've been wanting to try out. 
I'm going to do my best to put those on here to share with you and hopefully inspire you to get in the kitchen by yourself or with a kid and start cooking. 

Look forward to: 
recipes to celebrate food holidays
easy recipes to make with kids
yummy cake recipes
fun party food
easy basic recipes
dinner party ideas
and lots more!

Happy eating and happy reading!